Tuesday, August 19, 2014

DIY Butterfly cup puppets! Toddler Craft

Hmmm.. Another rainy day in Michigan..So we decided to get crafty today! We are sharing how to make your own butterfly cup puppets!  These are super cute, fun to make, and fun to play with :)


Here is what you will need:
1. Plastic cups
2. Glue
3. White paper (we used printer paper, you can also use construction paper)
4. Scissors
5. Pipe cleaners
6. Paint, markers, or crayons
7. Black construction paper


*I started by laying the cup down on the white paper and making a line along the top and bottom of the cup so you know how big to make the wings. 
*With the lines in place draw a "B" on each side so it looks like butterfly wings.  Cut the wings out and hand them to the kids to decorate.
*While they are decorating the wings (let them paint or color the wings how ever they want to) Make the slits in the top of the cup with scissors for the butterfly antennas.
*Cut one full pipe cleaner into 4's so you have short pipe cleaners.  Stick two in each cup for the antennas. **Note: Bend/twist the pipe cleaners together inside the top of the cup to keep them from falling out while they fly around. 
*I then let the kids cut out the eyes (On the black construction paper) for the butterfly and let them to glue the eyes on and they drew the mouth on with a black marker.
*If your kids painted the butterfly wings, let the wings dry a little, then glue the wings on the back of the cup.
*Your butterflies should now look like this:
 
That is what the back should look like..

There you have it! Butterfly cup puppets!! Once the glue drys these butterflies are ready to fly around the house! Here is a picture of my girls enjoying their butterflies :) 
And here's a close-up:
Have fun creating these cute butterfly cup puppets!!


Monday, August 18, 2014

DIY Sunshine paper plate- Toddler Craft

Today we are sharing how to make a Sunshine paper plate craft. Perfect craft for Toddlers and Preschoolers.

 Here is what you need:
1. Paper plates
2. Glue
3. Scissors
4. Markers and paint
5. Googly eyes
6. Tape (if you don't have glue)
7. Yellow Construction paper


*Start by letting the kids color or paint the back of the paper plate yellow.  Cover the whole plate in yellow.
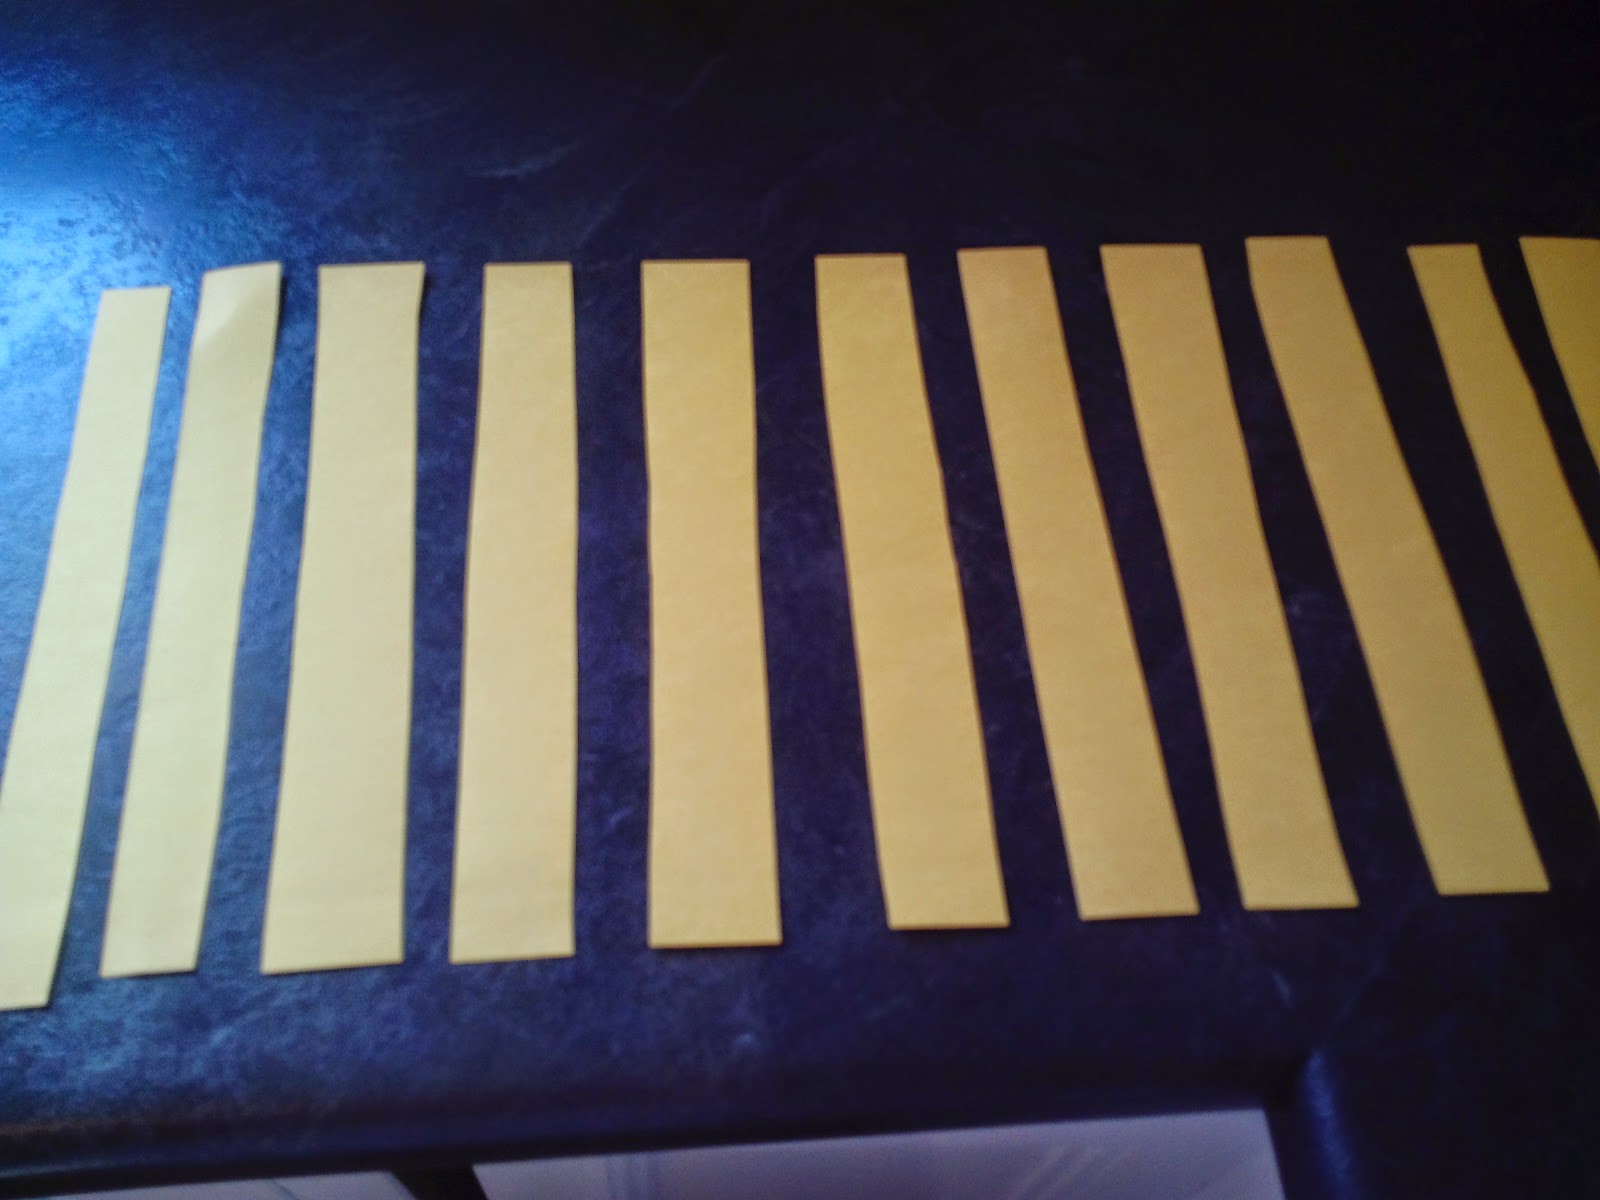
*While the kids were coloring their plates I took that time to cut out the Sunshine Rays.  Cut the construction paper into 1 inch wide strips.  I needed 6 long strips and 3 long strips cut in half for each Sunshine (paper plate). Your construction paper should look like this when finished:
*Once the kids are done decorating the paper plate its time to glue the Sunshine Rays on.
*Flip the paper plate over (so now its right side up) and begin gluing (or taping) the 6 long strips to the paper plate. We placed the strips so they were touching the inside circle of the plate.
*Do the same for the shorter strips.  Do this in the pattern of long strip, short strip, long strip, short strip, ect. Like this:

*Once that is done let the glue dry a bit and flip it over to make the Sunshine's face.  Glue the googly eyes in place and let the kids paint on the smile. 
*My girls wanted to hang their Sunshine's up so I found this white ribbon:
*To make a good looking loop hole you should use a paper hole puncher.  I couldn't find mine at the moment so I just used the scissors and cut a hole in the top of the plate.  Then placed the ribbon through the hole and tied a knot in it.
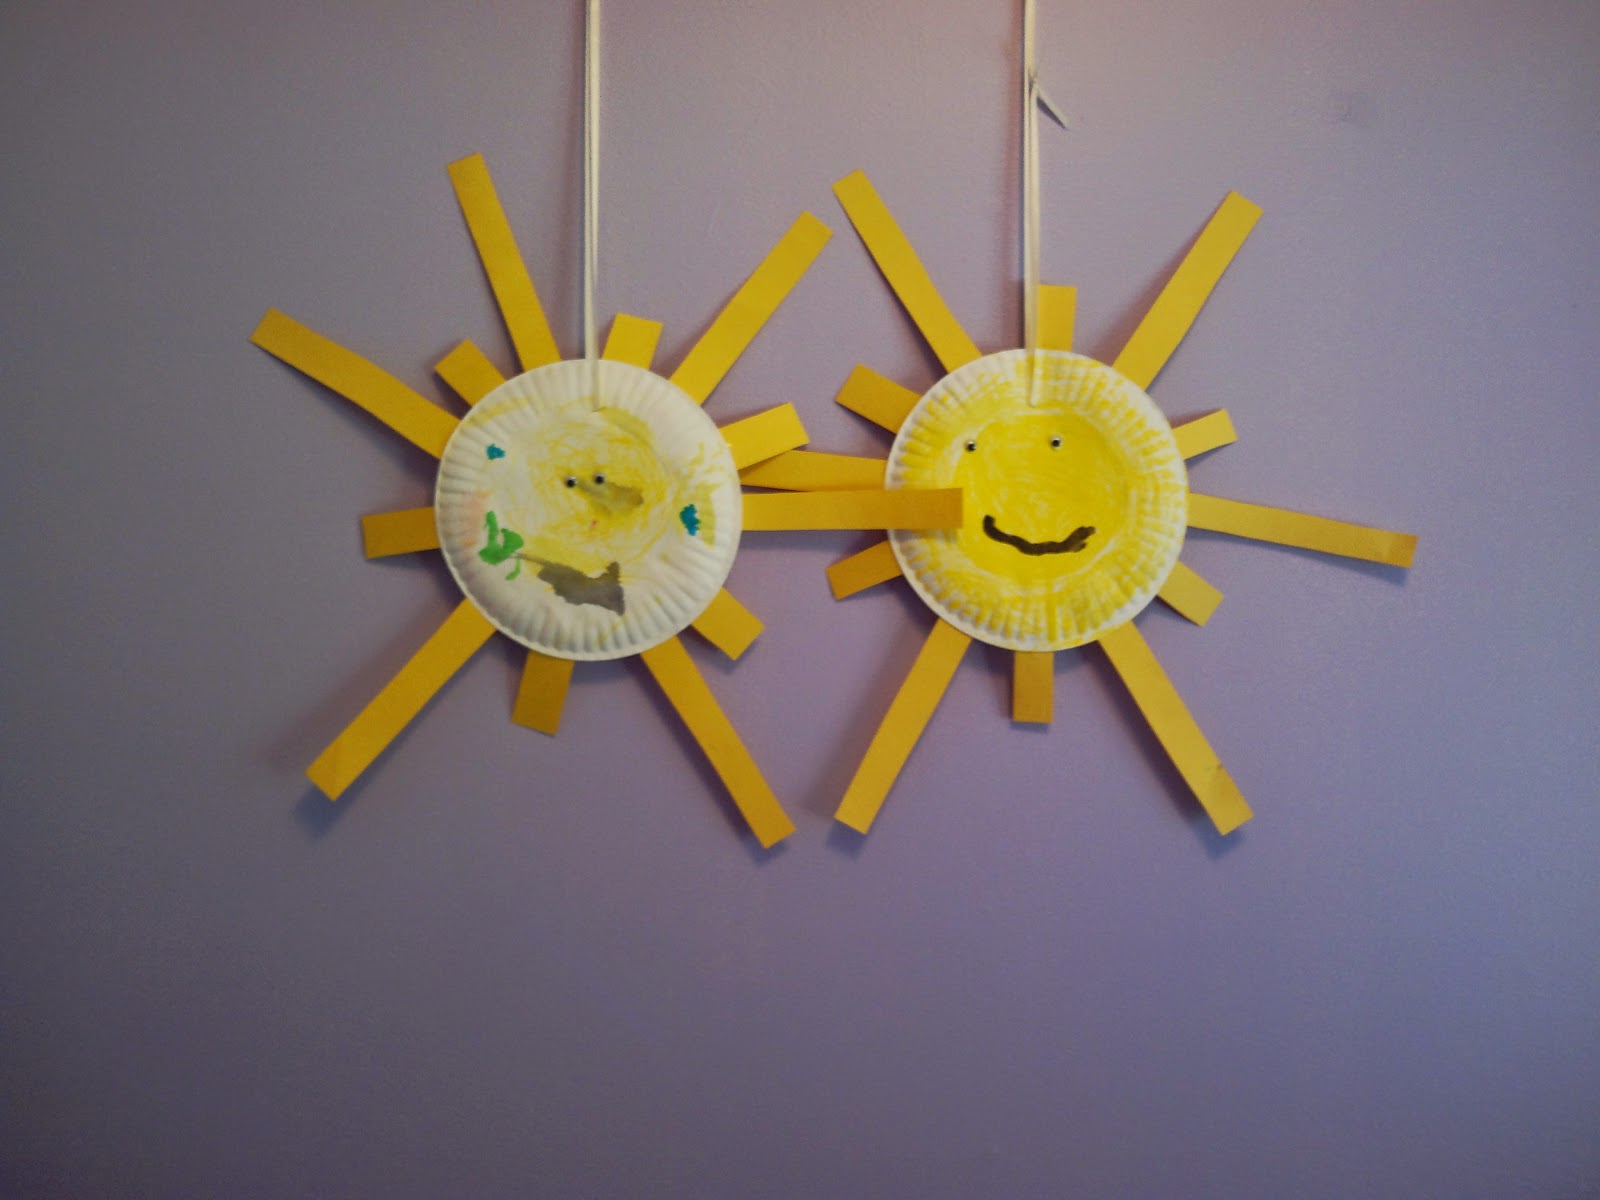
*Now you can hang your beautiful Sunshines!
I hope you and your little ones enjoy creating Sunshine! :)

Friday, August 15, 2014

DIY paper plate clown face- Toddler Craft

My girls love our "Craft Hour" each morning.  Today we wanted to share how to make a paper plate clown face.                                                                           
                                                                                  Here is what you will need:


1. Paper plates
2. Pom Poms
3. Paint or markers
4. Glue
5. A craft stick (or Popsicle stick)
6. Tape (optional)                                          


*Start by letting the kids choose if they want pom pom eyes and nose or just painted eyes and a pom pom nose. My girls had to do the opposite of each other today so I'll show you both lol.
*If you are doing pom pom eyes, help them glue the pom poms in place first.  If you are doing painted eyes let the kids paint their eyes on first.
*Once the eyes are in place glue a larger pom pom in the middle for a nose.
*Once the eyes and nose are in place, let the kids paint on the mouth.
My girls agreed on one thing today and that was a painted red mouth (Makayla still had to be different and add teeth).  
*You can also use the pom poms to make hair for the clown like Makayla did on hers:


*Or you can leave your clowns hair alone like Kyleigh did:


But Kyleigh had to add pom pom ears and feet to hers :)
*Once their clown faces are complete, glue the craft stick to the back of the plate.  I noticed this wasn't very sturdy so I also put a strip of tape over the stick to keep it from moving around.
There you have it! Clown Face paper plates! The girls loved this craft so much they each made about 6 of them and decorated each one differently.  I loved this craft as well because it was made with stuff we already had laying around the house!  If you don't have an endless supply of craft stuff laying around.. I have some you can purchase in bulk on my amazon store.


Have fun making your own clown faces! 

Tuesday, August 12, 2014

DIY Music Maker for Toddlers

What a gloomy, rainy day is it here today in Wyoming, Michigan!! So the girls and I decided to make our own music shakers :) Here is what you will need.
1. Cups- We used foam cups, you can also use plastic. The shakers require 2 cups per shaker.
2. Paint- And some kids to paint them ;) Or you can use markers, crayons, stickers, ect.
3. Tape- I used regular tape, Packaging tape would be ideal
4. Rice- You can also use beans or popcorn kernels.

We started by painting the cups.. Let the kids decorate the cups how ever they would like to! 
After they are done being creative let the cups dry.
Once the cups are dry, fill up one cup about half way with the rice, beans or popcorn kernels.
Place the empty cup on top of the other cup and tape around the meeting point.  Make sure you have a few layers of tape around it so it doesn't bust open.
Now let the kids have them so they can make some music!
My girls loved making these shakers! While I was taping the shakers they put their princess dress-up dresses on, I turned on the music and they had a "Princess Ball" in the living room and had a blast shaking their shakers to the beat of the music.  :)

Monday, August 4, 2014

Craftsy!

Craftsy

 I've been pretty busy this past week and weekend trying to gather up and mark things for a yard sale I'm running this week.  Keep your eye out for my Garage Sale Tips.. But anyway,  I had to take a break from that and do a blog post on this amazing site I found.   I just had to share this with all my fellow crafters!  Craftsy is a craft-lovers dream website.. They offer online how-to courses for tons of crafts such as:
  • Quilting
  • Cake Decorating
  • Knitting
  • Photography
  • *Embroidery
  • Drawing
  • Sewing
  • Paper crafts
  • Painting
  • Crocheting
  • Gardening
  • Jewerly
  • Food/Cooking
  • Woodworking
  • Weaving
  • Spinning
You can watch the courses on your own time and your access to the course never expires! Not only do they offer the classes but they also offer Kits and Craft Supplies in the area listed above. Craftsy offers all of this, plus they have an online community where members can share their patters, projects and their own free how-to's!  Recipes are available at Craftsy for the Bakers and Chefs as well.

Craftsy didn't stop there..

Craftsy also offer's an Affiliate Program!! WHAT?! Yes.. Get paid for referring people to one of the most popular craft sites online!

Join Craftsy’s Affiliate Program Today
Program Highlights
  • 30% commission on course sales
  • 10% commission on product sales
  • $1 for every new registered Craftsy account
  • 30 day cookie
  • $10 affiliate referrals: Invite your website-owning and blogging friends to join the Craftsy affiliate program and earn $10 for each friend who's approved.
If you have a blog or a website you can join today! This site is seriously AMAZING!! Not only do they teach you how to make crafts at home that you can sell to make an income for yourself but they also provide you with an income through their Affiliate Program.  If you love crafting.. no matter what it is.. Craftsy will have something for you!  As an added bonus.. if you join their Affiliate Program (which is 100% Free to join) they will give you a Free Craftsy course of your choosing up to a $49.99 value! I told you.. this website is amazing! I will post a review of their online course I received for free soon so check back for that.  In the meantime.. have fun surfing around on Craftsy!