Showing posts with label DIY Projects. Show all posts

Tuesday, August 19, 2014

DIY Butterfly cup puppets! Toddler Craft

Hmmm.. Another rainy day in Michigan..So we decided to get crafty today! We are sharing how to make your own butterfly cup puppets!  These are super cute, fun to make, and fun to play with :)


Here is what you will need:
1. Plastic cups
2. Glue
3. White paper (we used printer paper, you can also use construction paper)
4. Scissors
5. Pipe cleaners
6. Paint, markers, or crayons
7. Black construction paper


*I started by laying the cup down on the white paper and making a line along the top and bottom of the cup so you know how big to make the wings. 
*With the lines in place draw a "B" on each side so it looks like butterfly wings.  Cut the wings out and hand them to the kids to decorate.
*While they are decorating the wings (let them paint or color the wings how ever they want to) Make the slits in the top of the cup with scissors for the butterfly antennas.
*Cut one full pipe cleaner into 4's so you have short pipe cleaners.  Stick two in each cup for the antennas. **Note: Bend/twist the pipe cleaners together inside the top of the cup to keep them from falling out while they fly around. 
*I then let the kids cut out the eyes (On the black construction paper) for the butterfly and let them to glue the eyes on and they drew the mouth on with a black marker.
*If your kids painted the butterfly wings, let the wings dry a little, then glue the wings on the back of the cup.
*Your butterflies should now look like this:
 
That is what the back should look like..

There you have it! Butterfly cup puppets!! Once the glue drys these butterflies are ready to fly around the house! Here is a picture of my girls enjoying their butterflies :) 
And here's a close-up:
Have fun creating these cute butterfly cup puppets!!


Monday, August 18, 2014

DIY Sunshine paper plate- Toddler Craft

Today we are sharing how to make a Sunshine paper plate craft. Perfect craft for Toddlers and Preschoolers.

 Here is what you need:
1. Paper plates
2. Glue
3. Scissors
4. Markers and paint
5. Googly eyes
6. Tape (if you don't have glue)
7. Yellow Construction paper


*Start by letting the kids color or paint the back of the paper plate yellow.  Cover the whole plate in yellow.
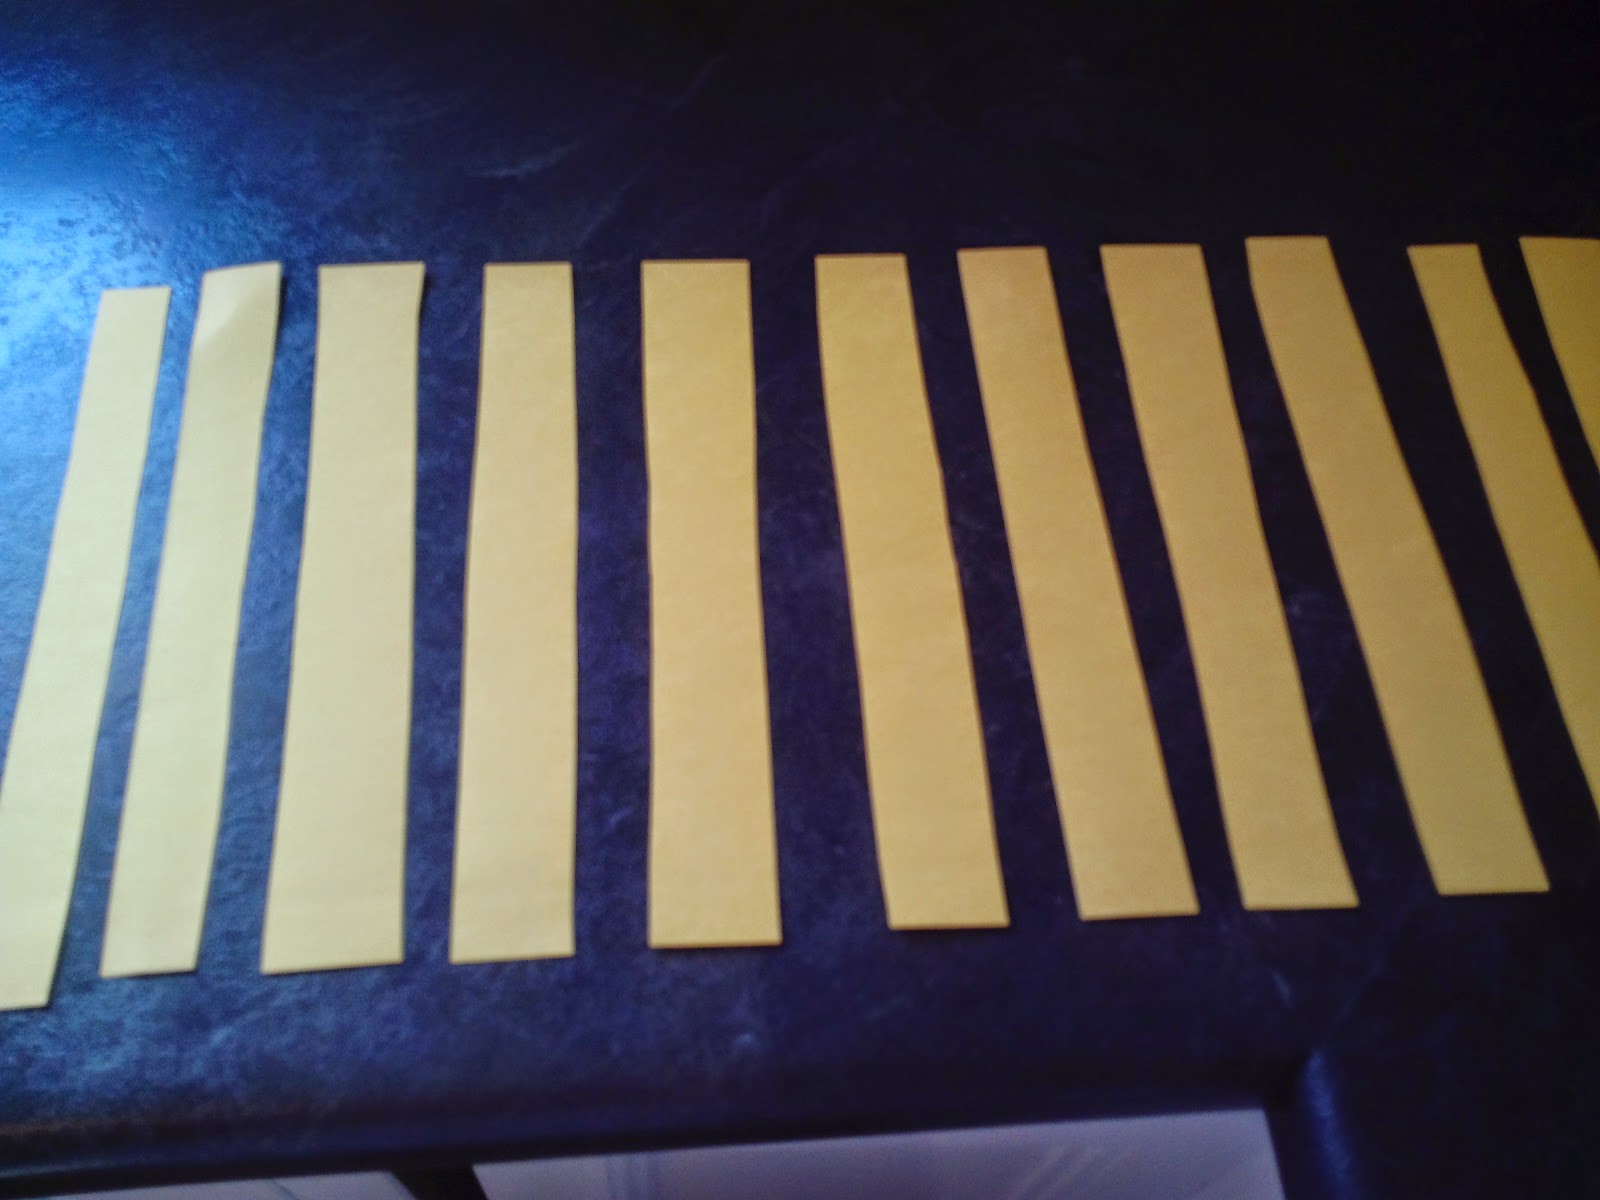
*While the kids were coloring their plates I took that time to cut out the Sunshine Rays.  Cut the construction paper into 1 inch wide strips.  I needed 6 long strips and 3 long strips cut in half for each Sunshine (paper plate). Your construction paper should look like this when finished:
*Once the kids are done decorating the paper plate its time to glue the Sunshine Rays on.
*Flip the paper plate over (so now its right side up) and begin gluing (or taping) the 6 long strips to the paper plate. We placed the strips so they were touching the inside circle of the plate.
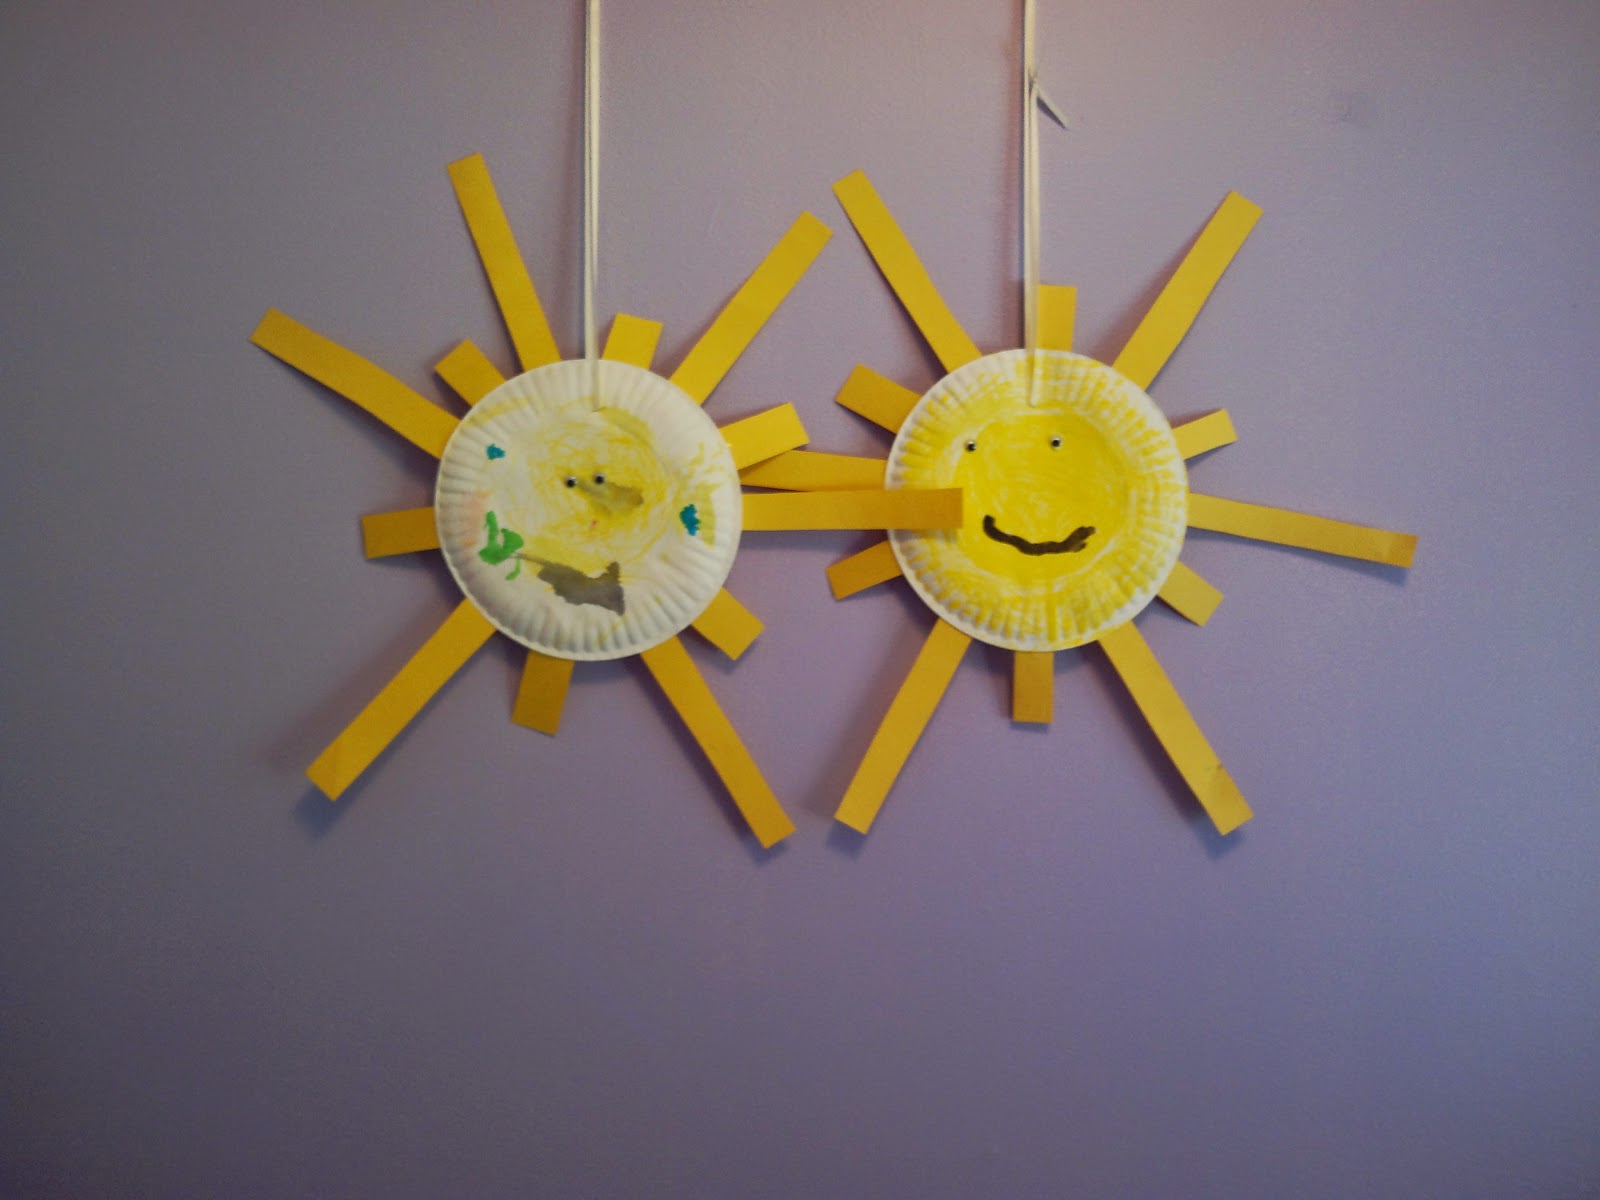
*Do the same for the shorter strips.  Do this in the pattern of long strip, short strip, long strip, short strip, ect. Like this:

*Once that is done let the glue dry a bit and flip it over to make the Sunshine's face.  Glue the googly eyes in place and let the kids paint on the smile. 
*My girls wanted to hang their Sunshine's up so I found this white ribbon:
*To make a good looking loop hole you should use a paper hole puncher.  I couldn't find mine at the moment so I just used the scissors and cut a hole in the top of the plate.  Then placed the ribbon through the hole and tied a knot in it.
*Now you can hang your beautiful Sunshines!
I hope you and your little ones enjoy creating Sunshine! :)

Friday, August 15, 2014

DIY paper plate clown face- Toddler Craft

My girls love our "Craft Hour" each morning.  Today we wanted to share how to make a paper plate clown face.                                                                           
                                                                                  Here is what you will need:


1. Paper plates
2. Pom Poms
3. Paint or markers
4. Glue
5. A craft stick (or Popsicle stick)
6. Tape (optional)                                          


*Start by letting the kids choose if they want pom pom eyes and nose or just painted eyes and a pom pom nose. My girls had to do the opposite of each other today so I'll show you both lol.
*If you are doing pom pom eyes, help them glue the pom poms in place first.  If you are doing painted eyes let the kids paint their eyes on first.
*Once the eyes are in place glue a larger pom pom in the middle for a nose.
*Once the eyes and nose are in place, let the kids paint on the mouth.
My girls agreed on one thing today and that was a painted red mouth (Makayla still had to be different and add teeth).  
*You can also use the pom poms to make hair for the clown like Makayla did on hers:


*Or you can leave your clowns hair alone like Kyleigh did:


But Kyleigh had to add pom pom ears and feet to hers :)
*Once their clown faces are complete, glue the craft stick to the back of the plate.  I noticed this wasn't very sturdy so I also put a strip of tape over the stick to keep it from moving around.
There you have it! Clown Face paper plates! The girls loved this craft so much they each made about 6 of them and decorated each one differently.  I loved this craft as well because it was made with stuff we already had laying around the house!  If you don't have an endless supply of craft stuff laying around.. I have some you can purchase in bulk on my amazon store.


Have fun making your own clown faces! 

Tuesday, August 12, 2014

DIY Music Maker for Toddlers

What a gloomy, rainy day is it here today in Wyoming, Michigan!! So the girls and I decided to make our own music shakers :) Here is what you will need.
1. Cups- We used foam cups, you can also use plastic. The shakers require 2 cups per shaker.
2. Paint- And some kids to paint them ;) Or you can use markers, crayons, stickers, ect.
3. Tape- I used regular tape, Packaging tape would be ideal
4. Rice- You can also use beans or popcorn kernels.

We started by painting the cups.. Let the kids decorate the cups how ever they would like to! 
After they are done being creative let the cups dry.
Once the cups are dry, fill up one cup about half way with the rice, beans or popcorn kernels.
Place the empty cup on top of the other cup and tape around the meeting point.  Make sure you have a few layers of tape around it so it doesn't bust open.
Now let the kids have them so they can make some music!
My girls loved making these shakers! While I was taping the shakers they put their princess dress-up dresses on, I turned on the music and they had a "Princess Ball" in the living room and had a blast shaking their shakers to the beat of the music.  :)

Tuesday, July 22, 2014

DIY Pen Holder

My girls decided they wanted to share a room.  I didn't put up a fight because I have been secretly waiting for them to share a room so I can finally have my own office ;)   I discovered after I moved into the office that I needed a place to put all my pens and pencils.  I'm more of a DIYer than a "go out and buy it" type of person so I decided to make my own pen/pencil holder and get the kids involved in the project to! I keep all of our used tin cans (whether its from canned veggies or spaghetti O's) I wash them out and store them in a box in the garage for ideas, such as this, that pop in my head.  So here's a tutorial on how to make your own pen/pencil holder or have your kids design you one.

Here is everything you will need:
*Cleaned and dried tin can
*Blank printer paper (you can also use scrapbook paper with designs on it or fabric)
*Scissors
*Hot glue gun
*If you are letting your kids create one for you, you will need their crayons, markers, and/or stickers.


1. Start by laying the tin can on its side.  I used a black crayon and drew a line where the can opens on one end and a line where the can ends at the bottom.  Then wrap the paper around the can.  Draw another line where the paper meets together on the other side of the can.  Cut on the guide lines you just drew so the paper will wrap around the can perfectly with no overhang.  
It should look like this when finished cutting.
 
2.  If you are letting the kids design your pen holder, take the paper off now and let them design away.  My girls colored pictures of our family on their papers and decorated them with stickers.  You can also use scrap-book paper with cute designs to match the colors of your office if you want a more sophisticated holder.
 3.  Once the kids are happy with their pictures you can plug in the glue gun!  Once its heated up, apply a strip of glue from the top of the can to the bottom of the can where the paper will meet.  Then make strips of glue around the entire can.  Try doing that as quick as possible so the glue doesn't dry.
4. Grab your paper the kids created and wrap it around the can.  Try to smooth out the glue with the paper.  Once I had the paper placed the way I wanted it, I used a strip of clear tape and put it over the meeting point for the paper in the back.  This is optional, The paper will stay in place with the glue but the tape gives it more of a smooth finished look on the back. If you used scrap-book paper, finish it by attaching a ribbon around the can.  That's it! Now put it on your desk, add some pens and pencils and Enjoy! :)


(I got lucky.. I started with no pen holder and the girls enjoyed the project so much that I ended up with 3! lol)
**Update:  I wanted to show you how you can make these cut pen holders with fabric as well.  You follow the same steps as above just using fabric instead.  I didn't have any cute fabric patterns left so I used an old Onesie I found in the girls old baby clothes box in the garage!  Here is a picture of the one I made :) And  yes this means I now have 4 pen holders! lol