Monday, August 18, 2014

DIY Sunshine paper plate- Toddler Craft

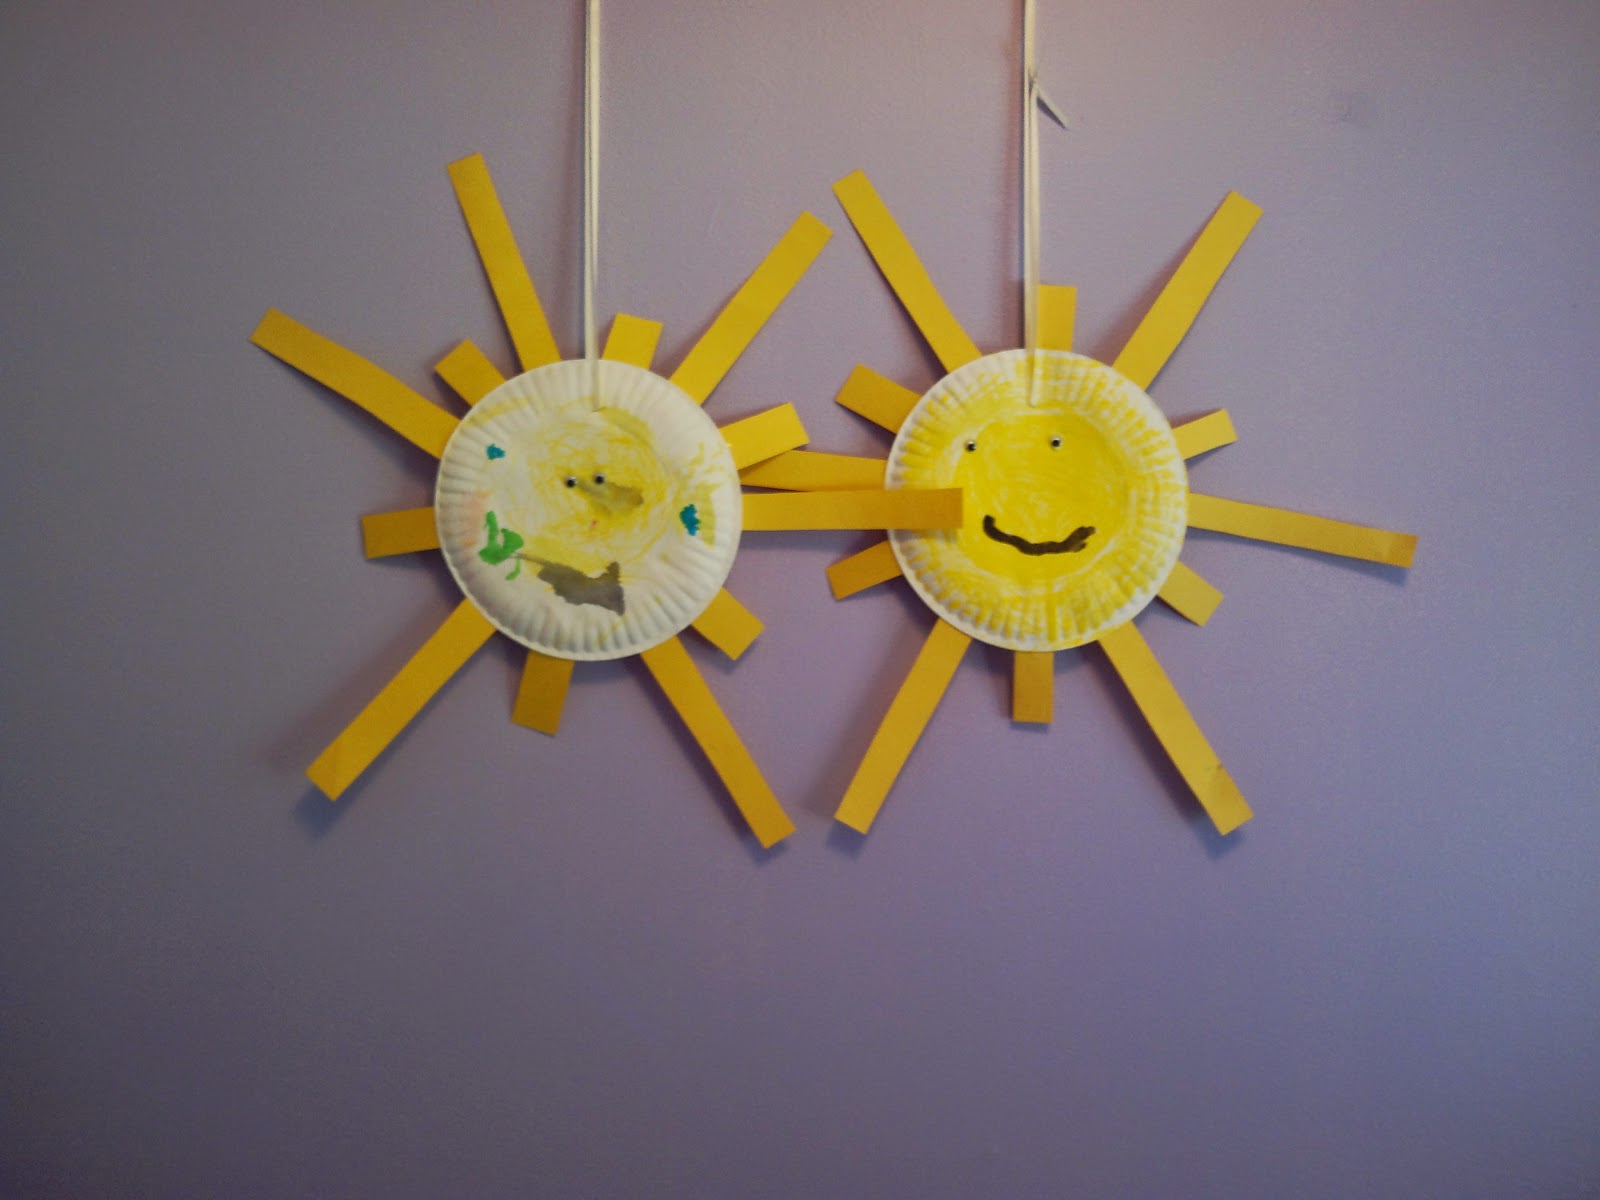
Today we are sharing how to make a Sunshine paper plate craft. Perfect craft for Toddlers and Preschoolers.

 Here is what you need:
1. Paper plates
2. Glue
3. Scissors
4. Markers and paint
5. Googly eyes
6. Tape (if you don't have glue)
7. Yellow Construction paper


*Start by letting the kids color or paint the back of the paper plate yellow.  Cover the whole plate in yellow.
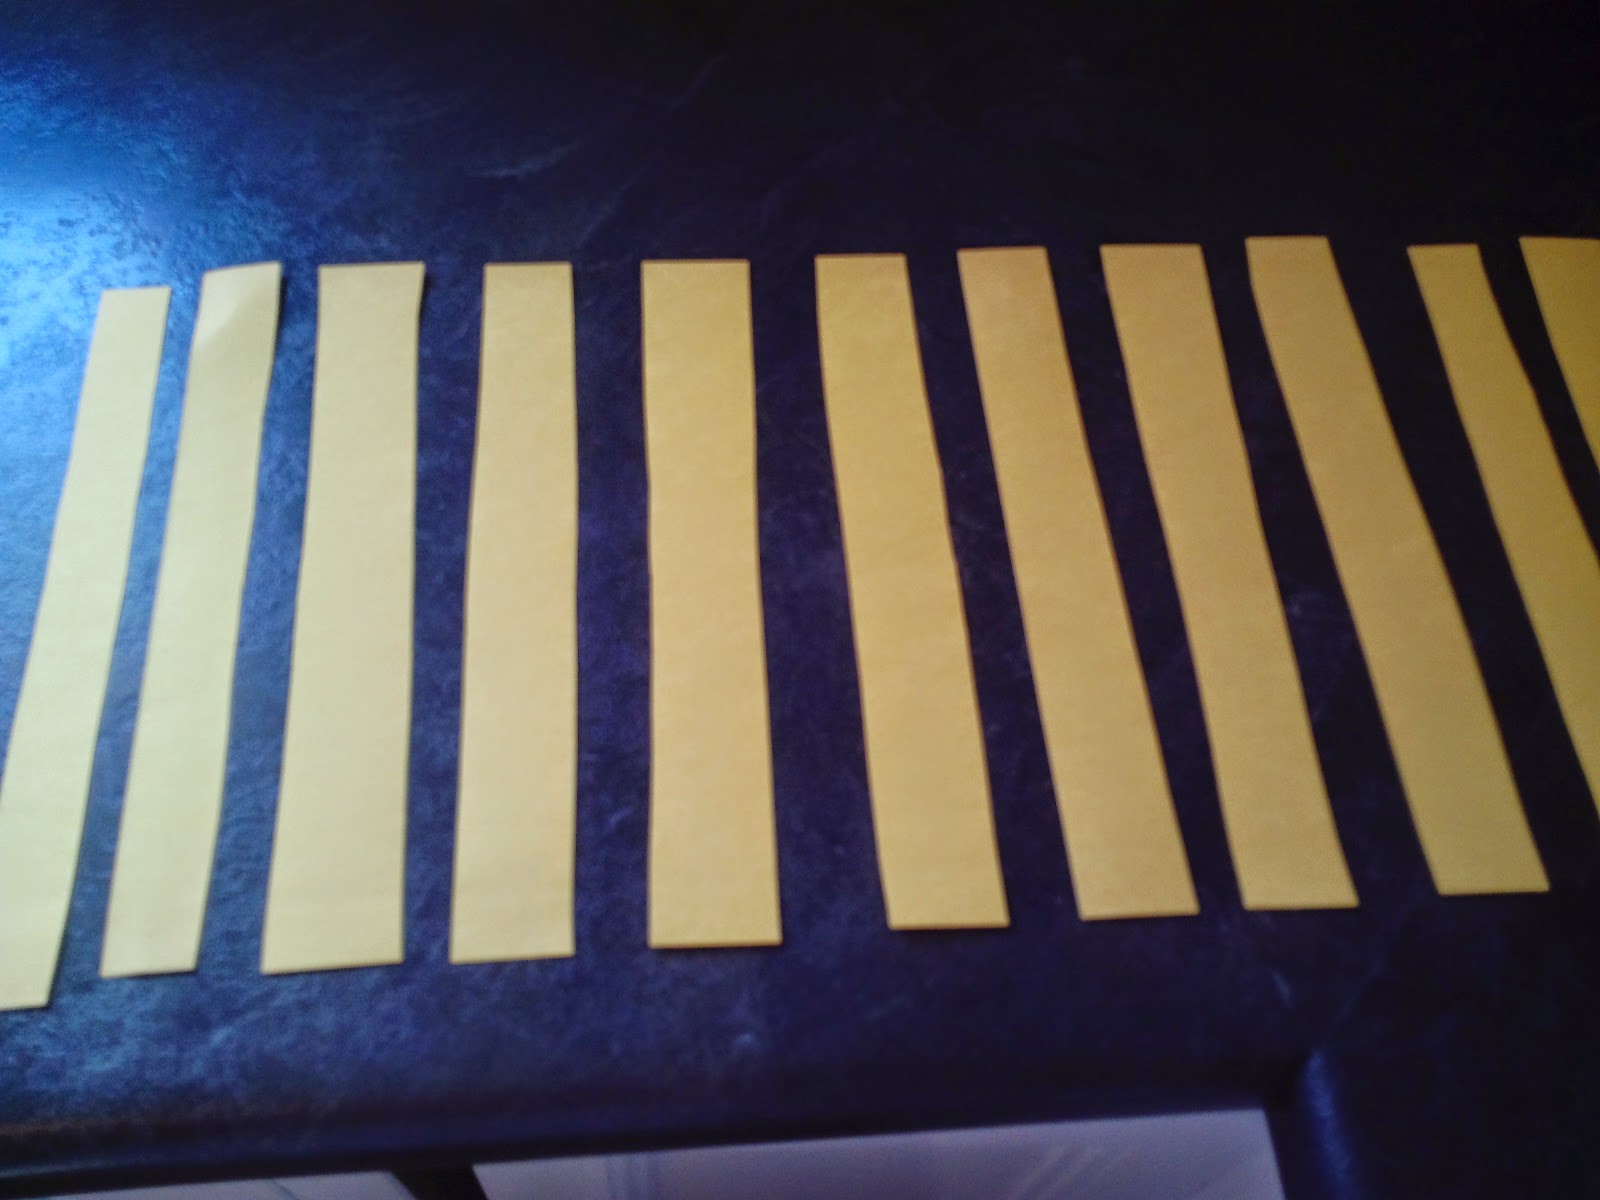
*While the kids were coloring their plates I took that time to cut out the Sunshine Rays.  Cut the construction paper into 1 inch wide strips.  I needed 6 long strips and 3 long strips cut in half for each Sunshine (paper plate). Your construction paper should look like this when finished:
*Once the kids are done decorating the paper plate its time to glue the Sunshine Rays on.
*Flip the paper plate over (so now its right side up) and begin gluing (or taping) the 6 long strips to the paper plate. We placed the strips so they were touching the inside circle of the plate.
*Do the same for the shorter strips.  Do this in the pattern of long strip, short strip, long strip, short strip, ect. Like this:

*Once that is done let the glue dry a bit and flip it over to make the Sunshine's face.  Glue the googly eyes in place and let the kids paint on the smile. 
*My girls wanted to hang their Sunshine's up so I found this white ribbon:
*To make a good looking loop hole you should use a paper hole puncher.  I couldn't find mine at the moment so I just used the scissors and cut a hole in the top of the plate.  Then placed the ribbon through the hole and tied a knot in it.
*Now you can hang your beautiful Sunshines!
I hope you and your little ones enjoy creating Sunshine! :)

Friday, August 15, 2014

DIY paper plate clown face- Toddler Craft

My girls love our "Craft Hour" each morning.  Today we wanted to share how to make a paper plate clown face.                                                                           
                                                                                  Here is what you will need:


1. Paper plates
2. Pom Poms
3. Paint or markers
4. Glue
5. A craft stick (or Popsicle stick)
6. Tape (optional)                                          


*Start by letting the kids choose if they want pom pom eyes and nose or just painted eyes and a pom pom nose. My girls had to do the opposite of each other today so I'll show you both lol.
*If you are doing pom pom eyes, help them glue the pom poms in place first.  If you are doing painted eyes let the kids paint their eyes on first.
*Once the eyes are in place glue a larger pom pom in the middle for a nose.
*Once the eyes and nose are in place, let the kids paint on the mouth.
My girls agreed on one thing today and that was a painted red mouth (Makayla still had to be different and add teeth).  
*You can also use the pom poms to make hair for the clown like Makayla did on hers:


*Or you can leave your clowns hair alone like Kyleigh did:


But Kyleigh had to add pom pom ears and feet to hers :)
*Once their clown faces are complete, glue the craft stick to the back of the plate.  I noticed this wasn't very sturdy so I also put a strip of tape over the stick to keep it from moving around.
There you have it! Clown Face paper plates! The girls loved this craft so much they each made about 6 of them and decorated each one differently.  I loved this craft as well because it was made with stuff we already had laying around the house!  If you don't have an endless supply of craft stuff laying around.. I have some you can purchase in bulk on my amazon store.


Have fun making your own clown faces! 

Tuesday, August 12, 2014

DIY Music Maker for Toddlers

What a gloomy, rainy day is it here today in Wyoming, Michigan!! So the girls and I decided to make our own music shakers :) Here is what you will need.
1. Cups- We used foam cups, you can also use plastic. The shakers require 2 cups per shaker.
2. Paint- And some kids to paint them ;) Or you can use markers, crayons, stickers, ect.
3. Tape- I used regular tape, Packaging tape would be ideal
4. Rice- You can also use beans or popcorn kernels.

We started by painting the cups.. Let the kids decorate the cups how ever they would like to! 
After they are done being creative let the cups dry.
Once the cups are dry, fill up one cup about half way with the rice, beans or popcorn kernels.
Place the empty cup on top of the other cup and tape around the meeting point.  Make sure you have a few layers of tape around it so it doesn't bust open.
Now let the kids have them so they can make some music!
My girls loved making these shakers! While I was taping the shakers they put their princess dress-up dresses on, I turned on the music and they had a "Princess Ball" in the living room and had a blast shaking their shakers to the beat of the music.  :)

Monday, August 4, 2014

Craftsy!

Craftsy

 I've been pretty busy this past week and weekend trying to gather up and mark things for a yard sale I'm running this week.  Keep your eye out for my Garage Sale Tips.. But anyway,  I had to take a break from that and do a blog post on this amazing site I found.   I just had to share this with all my fellow crafters!  Craftsy is a craft-lovers dream website.. They offer online how-to courses for tons of crafts such as:
  • Quilting
  • Cake Decorating
  • Knitting
  • Photography
  • *Embroidery
  • Drawing
  • Sewing
  • Paper crafts
  • Painting
  • Crocheting
  • Gardening
  • Jewerly
  • Food/Cooking
  • Woodworking
  • Weaving
  • Spinning
You can watch the courses on your own time and your access to the course never expires! Not only do they offer the classes but they also offer Kits and Craft Supplies in the area listed above. Craftsy offers all of this, plus they have an online community where members can share their patters, projects and their own free how-to's!  Recipes are available at Craftsy for the Bakers and Chefs as well.

Craftsy didn't stop there..

Craftsy also offer's an Affiliate Program!! WHAT?! Yes.. Get paid for referring people to one of the most popular craft sites online!

Join Craftsy’s Affiliate Program Today
Program Highlights
  • 30% commission on course sales
  • 10% commission on product sales
  • $1 for every new registered Craftsy account
  • 30 day cookie
  • $10 affiliate referrals: Invite your website-owning and blogging friends to join the Craftsy affiliate program and earn $10 for each friend who's approved.
If you have a blog or a website you can join today! This site is seriously AMAZING!! Not only do they teach you how to make crafts at home that you can sell to make an income for yourself but they also provide you with an income through their Affiliate Program.  If you love crafting.. no matter what it is.. Craftsy will have something for you!  As an added bonus.. if you join their Affiliate Program (which is 100% Free to join) they will give you a Free Craftsy course of your choosing up to a $49.99 value! I told you.. this website is amazing! I will post a review of their online course I received for free soon so check back for that.  In the meantime.. have fun surfing around on Craftsy!


Tuesday, July 29, 2014

Printables

Are you a blogger with too many passwords and Id's to remember?? I know I have a ton and I hate spending 20 minutes trying to log into an account because I forgot my user name and password.  So, I've created a user id list printable to keep all those user id's and passwords organized and in one place.  This printable isn't as fancy as some of the ones I have seen on Pinterest, but this one is free to download and does the same job as the other fancy ones.  I created this in Microsoft Word.  I also have a few more blogger printables that I have created, you can download them all for free on my website.  Click HERE to visit my printables page and get organized! :)
Do you need a certain printable you can't find online for free?? Let me know what you need on the printable and I can create one for you. Here is a look at the User ID List you can download on my site.
 
Have fun getting organized! :)

Tuesday, July 22, 2014

DIY Pen Holder

My girls decided they wanted to share a room.  I didn't put up a fight because I have been secretly waiting for them to share a room so I can finally have my own office ;)   I discovered after I moved into the office that I needed a place to put all my pens and pencils.  I'm more of a DIYer than a "go out and buy it" type of person so I decided to make my own pen/pencil holder and get the kids involved in the project to! I keep all of our used tin cans (whether its from canned veggies or spaghetti O's) I wash them out and store them in a box in the garage for ideas, such as this, that pop in my head.  So here's a tutorial on how to make your own pen/pencil holder or have your kids design you one.

Here is everything you will need:
*Cleaned and dried tin can
*Blank printer paper (you can also use scrapbook paper with designs on it or fabric)
*Scissors
*Hot glue gun
*If you are letting your kids create one for you, you will need their crayons, markers, and/or stickers.


1. Start by laying the tin can on its side.  I used a black crayon and drew a line where the can opens on one end and a line where the can ends at the bottom.  Then wrap the paper around the can.  Draw another line where the paper meets together on the other side of the can.  Cut on the guide lines you just drew so the paper will wrap around the can perfectly with no overhang.  
It should look like this when finished cutting.
 
2.  If you are letting the kids design your pen holder, take the paper off now and let them design away.  My girls colored pictures of our family on their papers and decorated them with stickers.  You can also use scrap-book paper with cute designs to match the colors of your office if you want a more sophisticated holder.
 3.  Once the kids are happy with their pictures you can plug in the glue gun!  Once its heated up, apply a strip of glue from the top of the can to the bottom of the can where the paper will meet.  Then make strips of glue around the entire can.  Try doing that as quick as possible so the glue doesn't dry.
4. Grab your paper the kids created and wrap it around the can.  Try to smooth out the glue with the paper.  Once I had the paper placed the way I wanted it, I used a strip of clear tape and put it over the meeting point for the paper in the back.  This is optional, The paper will stay in place with the glue but the tape gives it more of a smooth finished look on the back. If you used scrap-book paper, finish it by attaching a ribbon around the can.  That's it! Now put it on your desk, add some pens and pencils and Enjoy! :)


(I got lucky.. I started with no pen holder and the girls enjoyed the project so much that I ended up with 3! lol)
**Update:  I wanted to show you how you can make these cut pen holders with fabric as well.  You follow the same steps as above just using fabric instead.  I didn't have any cute fabric patterns left so I used an old Onesie I found in the girls old baby clothes box in the garage!  Here is a picture of the one I made :) And  yes this means I now have 4 pen holders! lol


Saturday, July 19, 2014

Jamberry Nail Review & Giveaway!!!

Today is day 5 with my Jamberry Nails on!  I have to start off by saying that I am in love with these nails! The Jamberry Nail held up way better than my polish as you can see.  I was pretty busy this week and did a lot of projects around the house.  I moved my kids bedrooms around and organized my garage which caused a lot of dings and chips on my painted nails but it didn't phase the Jamberry Nail.  My family had a cook-out this week and I played 3 rounds of Horseshoes (and I beat the guys while I was at it ;) which also didn't bother the wrapped nail but it faded and chipped the painted nails. I should also mention the pink polish is a more expensive polish and in 5 days its already chipping, cracking and fading. I spend a LOT of time painting and making designs on my nails and the Jamberry Nails have the professional look everyone wants but the ability to let anyone apply them. The wraps were so easy to apply and after 5 days of comparing the wrap to polish I want to be a Jamberry Consultant so I can have these wraps on all the time! Speaking of a Jamberry Consultant, I wanted to mention Melissa.  She is the one who sent me these free samples of Jamberry Nails. Here are a few words from Melissa describing her company and why she became a consultant:
 Jamberry started as a company back in 2010 by 3 sisters, out of Utah, and has just taken off.  I am very happy with my role as an independent sales person for Jamberry, because it allows me to schedule my work around my life (which is great with having a 5 month old), instead of scheduling my life around my job.  Plus its a community of loving and supportive women who are always willing to build you up and support you in any way possible. Jamberry offers a sales structure set up similarly to Mary Kay or Scentsy, however we have less than 20K consultants right now, and Scentsy has over 350K.  Jamberry is gaining momentum very quickly, with national recognition in magazines and on Good Morning America.  I personally became a consultant because I love the product so much.  I am definitely not a sales person of any kind, but this product actually sells itself. I really wanted to be able to wear the nail wraps, because I have a 5 month old daughter who loves to suck on my fingers, so I wasn't willing to wear nail polish, because I didn't want her to ingest any of it.  These wraps are non-toxic, gluten, soy and dairy free, and when applied and removed properly, they will not damage your nails.  They can last up to 2 weeks on fingers and as many as 6 weeks on toes, all with no chipping. I am very excited not only about being able to have nice nails on days when I can't even get dressed (yet my nails still look super cute!!), but the opportunity to work from home and not only bring in extra income, but to be able to offer this to other women who want to stay at home. I have decided to also focus on informing others about this great opportunity just because it has been such a wonderful experience for me.  I never pictured myself a stay at home mom, I have always been either at work or in school, so to actually find a stay at home job that is not a scam (I almost got scammed right before I took this current job but I caught on before I did anything too dumb), and has a product that I enjoy, doing work that I am good at, is great! Here is Melissa's website: https://melissabolgen.jamberrynails.net
I hope you enjoyed the review's on this amazing work at home opportunity and their great product! Here is the link for the giveaway I know you all have been waiting for! :) a Rafflecopter giveaway
Enter to win your own set of Jamberry Nails.. here is the style: